Preferences
When [Preferences] is selected from the [CONFLEX] menu (macOS) or the [Edit] menu (Linux or Windows), the [Preferences] dialog appears.
The following items can be set.
- Display mode switching
- OpenGL Graphics features
- Calculation server registgration and settings
- CONFLEX Server settings
- CONFLEX DOCK Server settings
- Gaussian Server Settings
At the bottom of dialog, there are 3 buttons:
- Apply button
- Apply changes and keep dialog box open.
- Ok button
- Apply changes and close the dialog box.
- Cancel button
- Discard changes and close the dialog box.
Appearance preferences
The first option is “Appearance/User Interface Mode”.
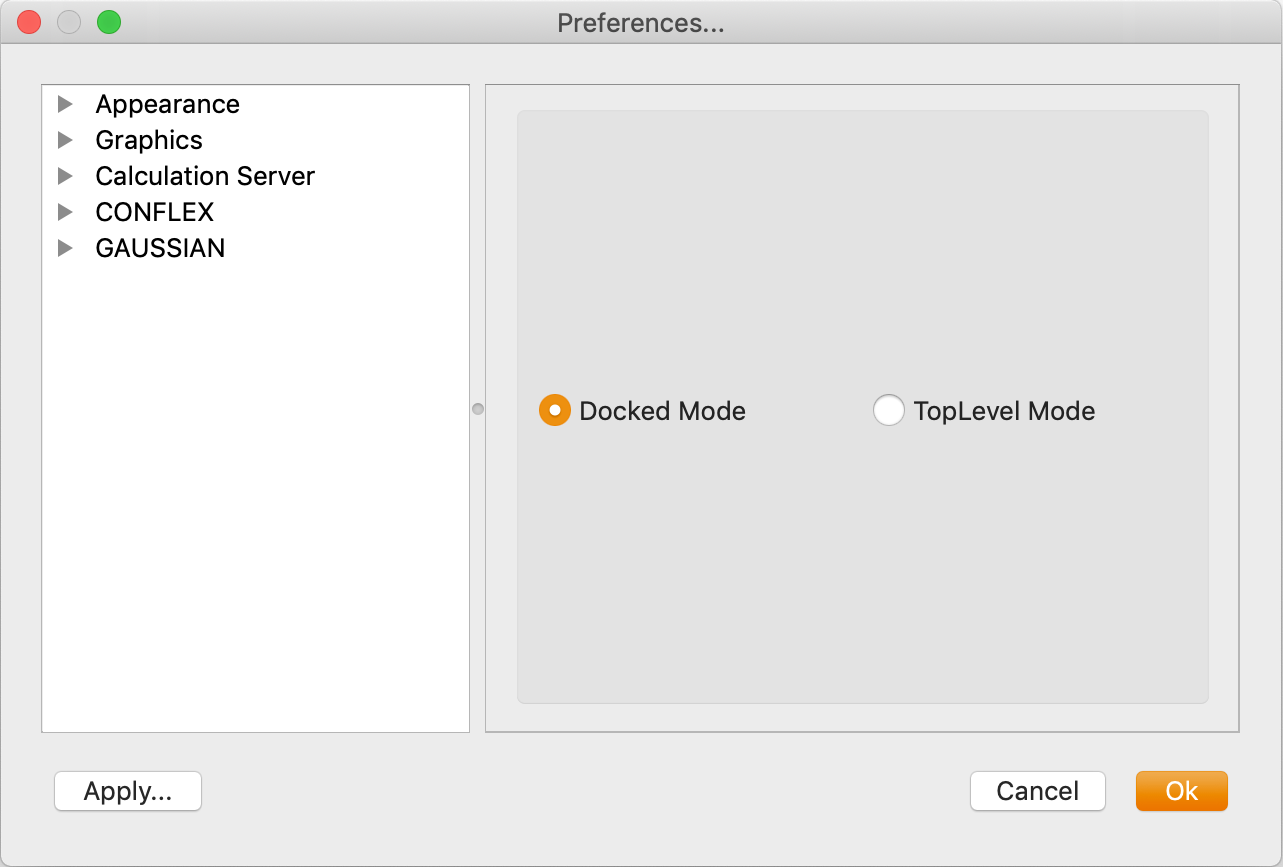
The screen display of the program is switched between the Docked mode and TopLevel mode:
- Docked Mode
- All sub-windows are placed in the large main window. This mode is commonly used in Windows environments.
- TopLevel Mode
- This is the mode most commonly used in macOS environments, where all windows and dialogs are displayed independently.
Graphics preferences
Here, the following items can be set.
- General graphic settings
- Molecule graphic settings
- Surface graphic settings
- Crystal & Axis graphic settings
General
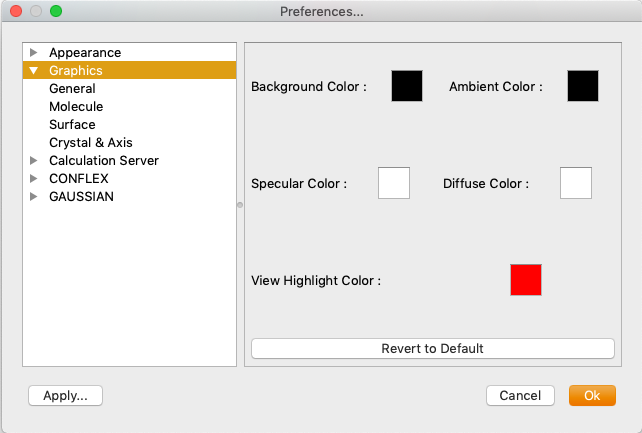
Here, the following items can be set:
- Background Color
- This is used to set the background color of the molecule.
- Ambient Color
- This is used to set the color of light from the periphery.
- Specular Color
- This is used to set the color of light reflected off the surface of the model.
- Diffuse Color
- This is used to set the color of the light diffused and reflected from the light source.
- View Highlight Color
- This is used to set the frame color of the current view when multiple views are displayed.
- [Rever to Default] button
- When this button is clicked settings are returned to default.
Molecule
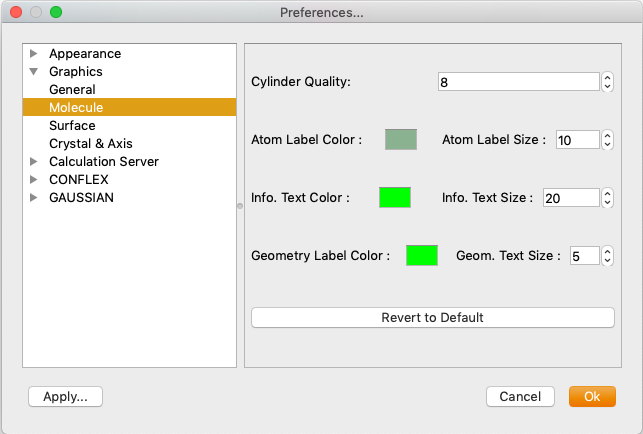
In this section, you can set up the molecular display.
- Cylinder Quality
- Specify the cylinder display quality in the ball & stick display.
- Atom Label Color
- Set the color of the atomic label.
- Info. Text Color
- Set the view's information label color for multi-view display.
- Geometry Label Color
- Set the color of the label for interatomic distance, bond angle, and torsion angle.
- Atom Label Size
- Sets the size of the atomic label.
- Info . Text Size
- Sets the character size of the view’s information label.
- Geom Text Size
- Set the character size of interatomic distance, bond angle and dihedral angle.
- [Rever to Default] button
- Pressing this button will return to the default settings.
Surface
In this section, you will configure settings related to the molecular surface.
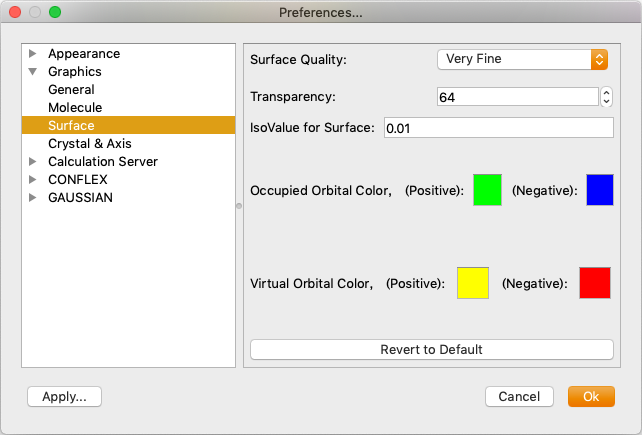
- Surface Quality
-
Specify the quality of electron density iso-surface.
Options are Coarse, Medium, Fine, Very Fine and Ultra Fine. - Transparency
- Specify the surface's degree of transparency be- tween 0 to 255.
- IsoValue for Surface
- Specify the electron density used for generating iso-surface.
- Occupied Orbital Color
- Virtual Orbital Color
- Specify colors for molecular orbitals. You can specify Occupied or Unoccupied and Positive or Negative colors respectively (see above figure).
- [Rever to Default] button
- Pressing this button will return to the default settings.
Crystal & Axis
In this section, you can configure the settings for crystal display.
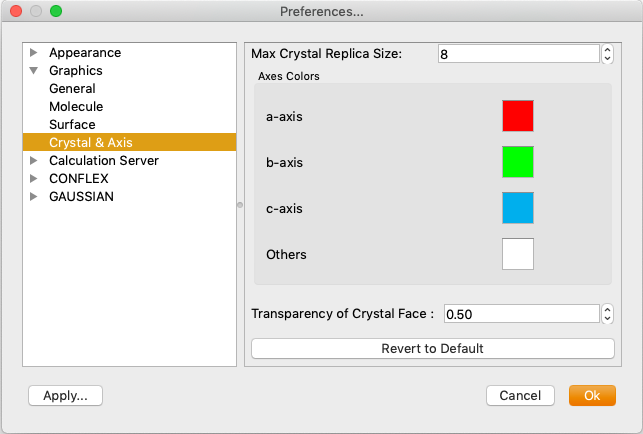
- Max Crystal Replica Size
-
Specify the max replica size to be created to speed up the crystal display.
Note: If the value is too large, the operation will be slow.
- Axes Colors
- Specify the axis color of unit cell of crystal.
- Transparency of Crystal Face
- Specify the transparency of crystal face.
- [Rever to Default] button
- Pressing this button will return to the default settings.
Calculation Server
The remote calculation 5server can be registered here.
When a CONFLEX server managed by PBS is present in the network, a job can be submitted via the network for calculation on the remote server.
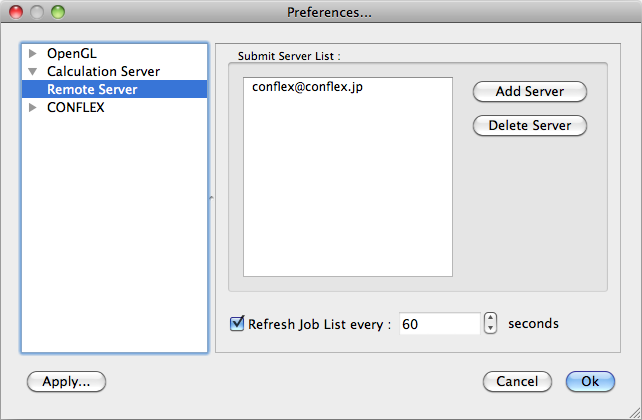
Registered servers are displayed here.
To register a new server, click the [Add Server] button. A dialog box for server registration will appear as shown below:

- User name:
- User name to access the server.
- Server address:
- The IP address or machine name of the server.
- Have Authorized Key:
- When [authorized_keys] is set on the server (to be discussed further on), a user can access the calculation server without having to enter a server password. If this is unchecked, a user will be required to use a server password for access. (Windows only)
- Job Scheduler
- Choose a Job Scheduler running on remote server. The options are “Grid Engine”, “Platform LSF” and “PBS Pro”.
- Job Scheduler PATH:
- This is the home directory of the Job Scheduler software used to manage jobs on the server.
Delete Server
To delete a server from the list, click the [Delete Server] button.
Refresh Job List every:
Designates the update frequency of the jobs listed in the Job Manager window. If not checked, updating can be done manually.
Please note: When the updating frequency is short, the system and network are accessed frequently. CONFLEX Interface and other network applications may be adversely affected.
Authorized Kyes
User can access the server without a password by setting the SSH private and public keys on both server and client machines. First, a key pair is created on the client machine using the following procedures.
- First, create a key for the client machine by following steps
- macOS or Linux
- Run terminal.
- Windows
- Run command prompt
- Enter “ssh-keygen -t rsa” at the prompt to create RSA code system key
- The [.ssh/id_rsa.pub] public key needs to be copied to the server. File transfer (FTP) software can be used or one may be copy it from the terminal using the following command.
- The transferred key file can be used as is and can be registered with the following command. (Please note that the [id_rsa.pub] file is in the home directory):
- Correct the file permissions:
- Finally, if you can log in from a terminal or command prompt without a password, you've successfully configured the system.:
You should see something similar to the output below:
$ ssh-keygen -t rsa
Generating public/private rsa key pair.
Enter file in which to save the key (/home/{USER_NAME}/.ssh/id_rsa):enter
Enter passphrase (empty for no passphrase):enter
Enter same passphrase again:enter
Your identification has been saved in /home/{USER_NAME}/.ssh/id_rsa.
Your public key has been saved in /Users/{USER_NAME}/.ssh/id_rsa.pub.
The key fingerprint is:
{The string list will be displayed}
A new pair of keys should now appear in the [~/.ssh] directory.
scp .ssh/id_rsa.pub SERVER_NAME:
(Don't forget the dot ‘.’ before ssh and don't forget the colon ‘:’ after the server name)
After this, the work will be done on the server side.
Server Side Settings for the Calculation Server
cat id_rsa.pub >> .ssh/authorized_keys
If the server does not have an [.ssh] directory, one needs to be created with the following commands:
mkdir .ssh
chmod 700 .ssh
chmod 600 .ssh/authorized_keys
ssh UserName@ServerName
Preferences in CONFLEX
A user can specify the CONFLEX execution program file(s) and parameter folder here. Also, a user can choose a job submit server.
Localhost settings
The [CONFLEX] → [Localhost] setting will display the name of the executable program that has been pre-installed in the program.
Each item has the following contents :
- CONFLEX exe file:
- Single-Core execution program
- Parallel CONFLEX exe file:
- Parallel execution program
- CONFLEX parameter folder:
- Name of folder containing the structural parameters used for calculations
- Max Threads
- Limit the number of threads that can be used in a node. The default number is automatically set by the number of cores included in the system.
- Refresh Job List every
- Sets the update interval of the job status in the “Job Manager”.
The above items can be set for the respective options by clicking on the [Select] button.
Remote Server Settings
An overview of registered servers for the [Calculation Server] is displayed in the [CONFLEX] → [Remote Server] section. Select a server by ticking the check box next to it.
Double-clicking on a server will open a window in which one can select an execution program on the server.
- CONFLEX HOME directory
- Enter the server-side PATH where CONFLEX is installed.
(Default: /usr/local/conflex)。 - Serial Executables
- From the executable programs listed here, select the file you want to use for one-core execution.
- Parallel Executables
- From the executable programs listed here, select the file you want to use for parallel execution.
Click the [OK] button to register.
Preferences in CONFLEX Docking
A user can specify the CONFLEX DOCK execution program file(s) and parameter folder here.
The [CONFLEX] → [Docking] setting will display the name of the executable program that has been pre-installed in the program.
Each item has the following contents :
- Docking exe file:
- CONFLEX DOCK execution program
- CONFLEX parameter folder:
- Name of folder containing the parameters used for calculations
- Max Threads
- Limit the number of threads that can be used in a node. The default number is automatically set by the number of cores included in the system.
- Refresh Job List every
- Sets the update interval of the job status in the “Job Manager”.
The above items can be set for the respective options by clicking on the [Select] button.
Click the [OK] button to register.
Preferences in Gaussian
This section selects the program, scratch disk, and server that will perform the Gaussian calculations.
Localhost Settings
In the [GAUSSIAN] → [Localhost] settings, a user can set the Gaussian executable file, the location of the scratch disk, and the maximum number of parallel threads.
- Gaussian exe file:
- Specifies Gaussian execution program.
- Gaussian Scratch directory:
- Specifies Gaussian Scratch directory.
- Maximum Threads:
- Specifies the maximum threads number inside node. Default value is set according to the number of your system cores.
- Refresh Job List every
- Specifies the refresh time of the “Job Manager”.
Remote Server Settings
In the [GAUSSIAN] → [Remote Server] setting, the servers registered in the “Calculation Server” environment setting are displayed in a list.
A user can choose a job submit server and Gaussian ROOT directory on the job submit server.
Check the box next to the server you want to use it. And in the [Gaussian ROOT:] field, enter the PATH to the Gaussian directory is installed (default: /usr/local). This is usually the same as the $g09root or $g16root environment variable on the server side.